


In the previous article I provided some background to an old photo album donated by blog and web site reader Jack Armstrong from Pennsylvania.
Of course the first thing I do with an album, whether it is one belonging to a family member or one that I have purchased for my collection, is to quickly page through it to see what treasures it contains. Once my initial curiosity's been satisfied (usually several times over) it's time to start the very important process of documentation. To examine the photographs properly I usually find it necessary to slide them out of their sleeves, and so it's vital that I first have a accurate and complete record, right at the start, of where everything belongs. It's important to keep the photographs in their correct order, particularly if there is any writing on the album pages but, even if there aren't any captions, the order may prove to be important in determining who the subjects are.

The equipment I use includes a flat table or mat, an A2 sheet of thick white paper or card, a pair of clean white cotton, lint-free gloves, a soft brush, a spatula with a thin blade, a digital camera, a flat bed scanner and, if necessary, a USB memory stick. I have a Kodak DX7590, which is a mid-range 5 MP camera with 10x optical zoom, several years old and perhaps in need of replacement, but quite adequate for these purposes. Any camera will do, as long as you are able to focus close enough and provide a sufficiently detailed image.

Using the sheet of white paper or card as a background, I photograph the front, back and sides of the album from various angles, showing any special features, such as the catches, embellishments, maker's marks, damage etc. The background is white merely for convenience - the important thing is that it is plain (or unpatterned) and uniform so that (a) it does not detract from the album itself, and (b) so that it can be digitally removed at a later stage without too much difficulty. I find it best to take the photographs indoors during the daytime in bright, but indirect, natural lighting conditions. I try to avoid using the flash, as it often causes unwanted reflections and washes out or otherwise changes the colours.

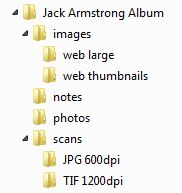
Then I take photographs of each double page of the album, laying it open flat in the centre of the white area, photographing from directly above, and making sure that my shadow doesn't fall within the field of view. If there are any loose photos, I take a shot first with them in situ, and then again with them removed. When done I make a quick check to see that all of the shots are focused and have come out okay, and then retake any that are not up to scratch. I download all of the images to my computer, using the standard Windows 7 import utility that starts automatically as soon as I connect via the USB cable and switch on the camera, rather than the cumbersome Kodak Easyshare software that came with the camera and failed to manage the transfer to Windows 7. If necessary, I renumber the images of the pages so that they reflect the sequence that they appear in the album, rather than the order in which they were taken.

I try to back up the files regularly on an external hard drive, and then less frequently onto DVDs, but I also often upload them to an online album, particularly if I am sharing the research with family or other researchers. For this exercise, I find the Picasa 3 utility (available as a free download) very useful. Once an online album has been set up, uploading a group of images is a very simple process achieved in just a few clicks. It is possible to specify an album as private (viewable only by yourself), restricted (viewers by invitation only) or public (with a public listing).

Note that there is often (although not always!) a sheet of loose backing paper between the back of one photograph and the back of the other photograph on the other side of the album page. The trick is to get the spatula between the photograph on your side of the page and the backing paper itself (see image and diagram above). Otherwise the backing paper tends to stick to the photograph when you try to slide it out and, if you proceed, it often catches on the edges of the hidden thick card, crumples and creates quite a mess, with the photograph getting stuck in the process. When in doubt, I leave it where it is and scan the photograph in situ, rather than risking any damage.


Colour Mode - Always use the full colour, rather than black-and-white, option even if scanning monotone photos, because the colour scan will pick up many subtleties that a B&W scan will not.
Output Resolution - Choose between 300-1200 dpi to suit your requirements
I don't usually bother to use any of the "Image Settings" except Auto Tone, which is switched on by default. Most of the actions represented by these features can be achieved at a later stage using image editing software.


The next stage in my procedure employs Photoshop tools to manipulate the RGB levels, RGB curves, colour balance/hue and saturation. These tools are available in many other image editing packages, but their names may differ. My purpose here is not to enhance the image so much as to adjust the scanned image so that it, as faithfully as possible on my particular monitor (a ViewSonic VX2433wm), equates to my visual assesment of the photograph. To a certain extent, it replaces what the other control settings in the scanner software (referred to previously) are designed to cater for. The process is often iterative, learnt by experience, and I initially found it very time consuming while I taught myself exactly what each tool did. Now it's pretty much routine.


The most important elements to familiarise yourself with are:
1. Contrast stretching or Normalisation - A simple linear contrast stretch is achieved by adjusting the minimum and maximum sliders on the histogram of RGB levels to to lower and upper limits of the data distribution, as shown in the images above. This has the effect of increasing the range of tones displayed, without losing any data.


2. RGB Curves - I use this tool to adjust the contrast of the image. The simplest adjustment is to drag the centre of the line/curve up or down until the contrast is the same as that seen in the actual photograph. It is equivalent to merely adjusting the central slider on the histogram adjust tool, described above, to the left or right, but this method offers more options. Additional anchor points may be inserted at positions along the line and the curve manipulated accordingly to achieve a variety of effects, otherwise termed non-linear contrast enhancement.


3. Hue-Saturation-Lightness - Lastly I adjust these three settings until I have an image looking as near as possible to the actual photograph. Some experimentation is often required, and it may be necessary to return to steps 1 or 2 to adjust the tonal range/contrast to suit. This may not be how I eventually choose to present the image in a document or web page, but I feel it is important to first have a record of what it looks like now.
When the scans are tidied up and smaller versions uploaded to my Picasa Web Album, I then start the documentation process, which I will cover in the next installment.
References & Further Reading
Anon (n.d.) Using the Photoshop Levels Tool & Using the Photoshop Curves Tool, Digital Photography Tutorials, Cambridge in Colour.
Fisher, R., Perkins, S., Walker, A. & Wolfart, E. (2003) Contrast Stretching, from Image Processing Learning Resources.
Liu, J.G. & Mason, P.J. (2009) Essential Image Processing and GIS for Remote Sensing, Wiley-Blackwell.
WOW! Awesome job of describing your process! Thank you I learned a lot!
ReplyDeleteThanks Terri, I learned a lot too.
ReplyDeleteI love playing with old photos, I thoroughly loved your article. Thanks!!!
ReplyDeleteThank you! This could not be more timely for me. I'm looking at 4 early 20th c. albums that I need to archive. A question - these contain snapshots from c. 1920 and are glued to the pages. Would you remove the photographs or simply photograph them?
ReplyDeleteI'm pleased to hear that my experiences are of some help. The question of early 20th Century albums in which photographs are often glued to the album pages is a tricky one, and one that I'm not really either confident or qualified to answer definitively.
ReplyDeleteOn the one hand, the process of removal may damage the photographs. On the other, leaving them in may also cause damage to the photos in the long run.
I think the primary consideration may be whether or not you can remove them without causing irreparable damage, and this will depend on the type of photographic paper and album page, and the glue used. Whatever you do, don't use water or solvents. All the authoritative texts I have read agree on this point - they will almost certainly damage the photographic emulsion irreparably.
If they are not easily removable - and I would always err on the side of caution - then it is necessary to either scan or photograph them in situ. Many of the albums of that era have removable pages, which will make the scanning job easier, but if not then open or remove the scanner cover altogether to enable scanning of the album pages. If light coming in around the sides is a problem, drape it with a white sheet when doing the scan. If this is not possible, then digital photographs are a possibility, although not my preferred option, as the quality is always so much poorer.
If the photographs are not removable, and there is a possibility of their damage due to the album pages being non-acid-free, then it's worth scanning them at the highest possible resolution and saving as TIFF files. You may not get another chance.
Regards and best wishes, Brett
Thank you so for the suggestions, Brett. I especially appreciate the tip on draping the scanner for oversized pieces. My instinct is to try & leave the albums intact. You've given me such a good outline that I feel sure I'll be able to get a digital record of the albums. Many, many thanks.
ReplyDeleteThis was a really helpful post with lots of how-to detail. I have several questions that perhaps you can answer.
ReplyDeleteFirst, is there an easy way to save a .TIFF image as a .JPG image, and vice versa? (I'm thinking of after it's on the computer and has been emptied from the scanner memory.)
And about Picasa. I've been using Picasa to make changes to my images but when I try to upload the changed images to my blog, they don't appear with the changes. There must be something I'm doing wrong. The changes I make are usually cropping and angle adjustment. (I don't have Photoshop, so using that isn't an option.) I've started to make changes in Windows Photo Gallery, but there are not as many options as in Picasa. I have Irfanview but haven't been pleased with it. It seems clumsy to use.
Thanks again for this great article. I appreciate your willingness to share your knowledge and experience.
Hi Nancy, and thanks for your kind comments. I've just spent a few minutes browsing through the selection of photos on your blog, but I'll have to go back to them later. I particularly like the picnic/camping photos.
ReplyDeleteTo answer your question about TIF => JPG conversion, yes there is, and it's very simple. Right click on the icon of the image, and choose "Open with - Paint." Then "Save as - JPG." Paint is a Windows Accessory programme, and has been for many years. That's just about the only thing that I use it for, though.
By the way, Picasa also has a facility for saving TIF files as JPGs. Just choose File->Save As and then select JPG under "Save as type," although it's usually already highlighted.
For editing of an image for a blog in Picasa: When you have made your changes and/or edits, make sure that you "Save As" and use a new file name. For example, if my image was IMG_0165.jpg, I'll just append an "x" on the end, to make it IMG_0165x.jpg. Then upload this new file to your Picasa Web Album, or wherever you have your images stored online. Don't forget to either reload the image into your blog article, or change the HTML to reflect the new filename.
It's best not to save it with the same filename as Blogger won't necessarily recognise that you've uploaded a new version. To explain further, depending on how you've set up blogger, whenever you insert a photograph into your blog article, it may copy a version of that image to a new location on the blogger server. So, if you change an image at its original location, that won't affect the copy that Blogger is using to display on your blog.
Does that help?
I haven't tried Windows PhotoGallery. I downloaded Irfanview a while ago and tried it, but I agree, it seemed clumsy, so I didn't bother any more. My version of Adobe Photoshop is VERY old (ver 5.5, 1999) but for my purposes it is quite sufficient.
Regards and best wishes, Brett
Brett, you are my new hero! Thanks so much for answering all my questions in such detail. Your answers are very, very helpful - exactly what I wanted to know. I appreciate your time and your willingness to share your expertise.
ReplyDelete